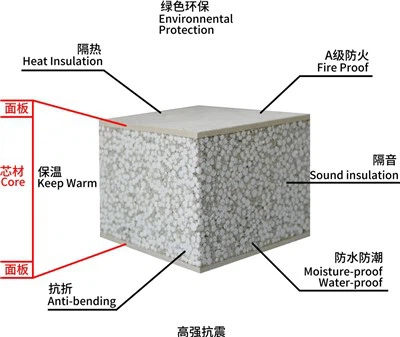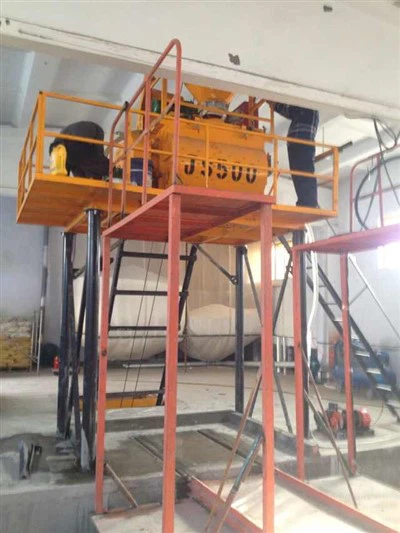

Hey there! As a supplier of 180mm Sandwich Panel Wall, I'm super stoked to walk you through the installation process. It's a pretty cool and straightforward procedure, and I'll break it down step by step.
Step 1: Preparation
First things first, you gotta get all your tools and materials ready. You'll need a measuring tape, a level, a saw (preferably a circular saw for clean cuts), screws, a drill, and of course, the 180mm Sandwich Panel Wall panels. Make sure the installation area is clean and free of any debris. Measure the space accurately to figure out how many panels you'll need. It's always a good idea to have a few extra panels on hand, just in case of any mistakes or unforeseen issues.
Step 2: Marking the Layout
Once you've got your panels and tools sorted, it's time to mark the layout on the floor and walls. Use a chalk line or a straight edge to create a guide for where the panels will go. This will help ensure that the panels are installed straight and evenly. Pay close attention to the corners and edges, as these areas can be a bit tricky. Make sure the marks are clear and visible, so you don't get confused during the installation process.
Step 3: Installing the Bottom Track
The next step is to install the bottom track. This is the base that the panels will sit on. Use the drill to attach the track to the floor along the marked layout. Make sure the track is level and secure. You can use screws or nails to fasten it down, depending on the type of floor you have. If you're installing the panels on a concrete floor, you might need to use a hammer drill to create holes for the screws.
Step 4: Cutting the Panels
Now it's time to cut the panels to the right size. Measure the height and width of the space between the top and bottom tracks, and then use the saw to cut the panels accordingly. Be careful when cutting the panels, as they can be a bit heavy and awkward to handle. It's a good idea to have someone help you hold the panels steady while you're cutting them. Make sure the cuts are straight and clean, as this will make it easier to install the panels later.
Step 5: Installing the Panels
Once the panels are cut to size, it's time to start installing them. Begin by placing the first panel into the bottom track. Make sure it fits snugly and is aligned with the markings on the floor and walls. Use the level to check that the panel is vertical. If it's not, make the necessary adjustments. Then, use screws or clips to attach the panel to the track. Repeat this process for each panel, working your way across the installation area.
Step 6: Joining the Panels
As you install the panels, you'll need to join them together. Most 180mm Sandwich Panel Wall panels come with a tongue-and-groove system that makes it easy to connect them. Simply slide the tongue of one panel into the groove of the adjacent panel. Make sure the connection is tight and secure. You can use a rubber mallet to gently tap the panels together if needed. This will help ensure a seamless and sturdy installation.
Step 7: Installing the Top Track
After all the panels are installed and joined together, it's time to install the top track. This will help hold the panels in place and provide additional support. Use the drill to attach the top track to the ceiling or wall along the marked layout. Make sure the track is level and aligned with the bottom track. Then, use screws or clips to secure the panels to the top track.
Step 8: Finishing Touches
Once the panels and tracks are installed, it's time to add the finishing touches. You can use trim pieces to cover the edges of the panels and give the installation a clean and professional look. You can also use caulking to seal any gaps between the panels and the walls or floor. This will help prevent air and moisture from seeping in.
Benefits of 180mm Sandwich Panel Wall
Now that you know how to install the 180mm Sandwich Panel Wall, let's talk about some of the benefits. These panels are super versatile and can be used in a variety of applications, such as offices, warehouses, and residential buildings. They're lightweight, which makes them easy to handle and install. They also provide excellent insulation, which can help reduce energy costs. Plus, they're fire-resistant and durable, which means they'll last for a long time.


If you're interested in learning more about our products, check out our Fireproof Partition Wall Panel and Lightweight Foaming Partition Panel. We also offer 150mm EPS Insulation Board, which is a great option for additional insulation.
Contact Us for Purchase
If you're thinking about purchasing 180mm Sandwich Panel Wall or any of our other products, don't hesitate to reach out. We're here to answer any questions you might have and help you with your project. Whether you're a contractor, builder, or a DIY enthusiast, we've got the right solutions for you. Just drop us a line, and we'll get back to you as soon as possible.
References
- Building Construction Handbook
- Insulation Materials Guide
So there you have it, folks! That's the installation process of 180mm Sandwich Panel Wall. I hope this blog post has been helpful. If you have any questions or comments, feel free to leave them below. Thanks for reading!