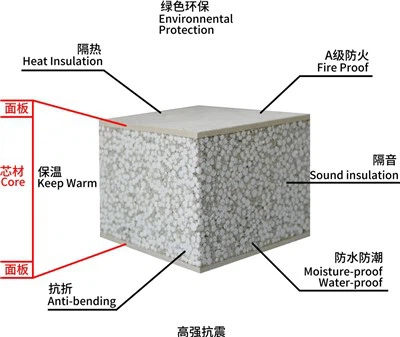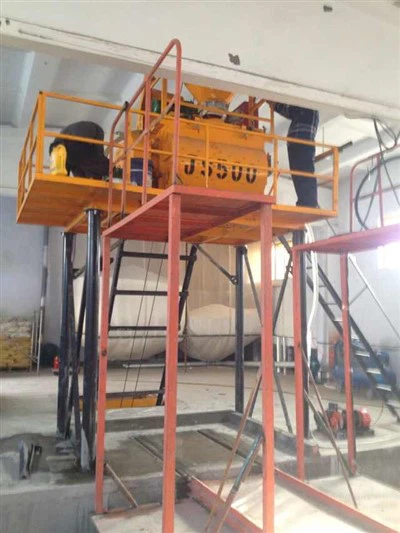

How to install the 180mm Sandwich Panel Wall on a sloped roof?
As a reliable supplier of 180mm Sandwich Panel Walls, I understand that installing these panels on a sloped roof can be a challenging yet rewarding project. In this blog post, I'll guide you through the step - by - step process of installing 180mm Sandwich Panel Walls on a sloped roof, ensuring a safe and efficient installation.
Step 1: Planning and Preparation
Before you start the installation, it's crucial to conduct a thorough site assessment. Measure the slope of the roof accurately. The slope is typically measured in degrees or as a ratio (e.g., 4:12). This measurement will help you determine the angle at which the panels need to be installed and whether any additional support structures are required.
Next, gather all the necessary tools and materials. You'll need a circular saw or a panel cutter for cutting the panels to the right size, a drill for making holes, screws or nails for fastening the panels, a level to ensure the panels are straight, and safety equipment such as gloves, goggles, and a harness if working at height.
It's also a good idea to check the weather forecast. Avoid installing the panels in extreme weather conditions such as heavy rain, strong winds, or high temperatures, as these can affect the installation process and the quality of the final result.
Step 2: Installing the Support Structure
The support structure is the backbone of the panel installation. For a sloped roof, you'll typically need to install purlins or battens. Purlins are horizontal beams that run perpendicular to the slope of the roof, while battens are thinner strips of wood or metal.
First, mark the positions of the purlins or battens on the roof. The spacing between them will depend on the load - bearing requirements of the panels and the slope of the roof. Generally, for 180mm Sandwich Panel Walls, a spacing of 600 - 900mm is recommended.
Use a drill to make holes in the roof and insert appropriate fasteners to secure the purlins or battens. Make sure they are level and straight, as any unevenness can cause problems during the panel installation.
Step 3: Cutting the Panels
Once the support structure is in place, it's time to cut the 180mm Sandwich Panel Walls to the required size. Measure the length and width of each panel carefully, taking into account the slope of the roof and any openings such as windows or doors.
Use a circular saw or a panel cutter to make the cuts. When cutting, wear appropriate safety gear to protect yourself from flying debris. Make sure the cuts are straight and accurate, as any irregularities can affect the fit and performance of the panels.
If you need to cut around openings, use a jigsaw or a fine - toothed saw for more precise cuts. Take your time and double - check your measurements before making each cut.
Step 4: Lifting and Positioning the Panels
Lifting the 180mm Sandwich Panel Walls onto the sloped roof can be a challenging task. You may need to use a crane or a hoist if the panels are large and heavy. Make sure the lifting equipment is properly secured and rated for the weight of the panels.
Once the panels are on the roof, position them carefully on the support structure. Start from the bottom of the slope and work your way up. Use a level to ensure the panels are horizontal and plumb. If necessary, adjust the position of the panels by tapping them gently with a rubber mallet.
Step 5: Fastening the Panels
After positioning the panels, it's time to fasten them to the support structure. Use screws or nails that are suitable for the type of panels and the support material. For 180mm Sandwich Panel Walls, self - tapping screws are often a good choice.
Start at the edges of the panels and work your way towards the center. Make sure the screws or nails are evenly spaced and tightened securely. However, be careful not to overtighten them, as this can damage the panels.
When fastening the panels, pay special attention to the joints between the panels. Use appropriate sealing materials such as silicone sealant to ensure a watertight and airtight seal. This will help prevent water leakage and improve the energy efficiency of the building.
Step 6: Sealing the Joints
Sealing the joints between the 180mm Sandwich Panel Walls is an important step in the installation process. As mentioned earlier, use a high - quality silicone sealant to fill the gaps between the panels. Apply the sealant evenly along the joints, using a caulking gun for a smooth and consistent application.
Make sure the sealant is fully cured before exposing the panels to water or other environmental factors. This may take several hours or even days, depending on the type of sealant and the weather conditions.
Step 7: Finishing Touches
Once all the panels are installed and the joints are sealed, you can add any finishing touches such as trim or flashing. Trim can be used to cover the edges of the panels and give the installation a more professional look. Flashing is used to direct water away from the joints and prevent water damage.
Install the trim and flashing according to the manufacturer's instructions. Make sure they are properly secured and sealed to ensure long - term performance.


Additional Considerations
When installing 180mm Sandwich Panel Walls on a sloped roof, it's important to consider the ventilation requirements. Proper ventilation helps prevent moisture buildup inside the panels, which can lead to mold and mildew growth. You may need to install ventilation openings or use ventilated panels to ensure adequate air circulation.
Also, if you're working in an area with high snow loads, you may need to reinforce the support structure or use panels with a higher load - bearing capacity. Consult with a structural engineer or a building professional to determine the best approach for your specific situation.
Related Products
If you're interested in other types of sandwich panels, we also offer EPS Cement Sandwich Insolation Board, 120mm EPS Wall Panels, and 90mm EPS Concrete Sandwich Board. These products are designed to meet different insulation and structural requirements.
Contact Us for Purchase and Consultation
If you're considering purchasing 180mm Sandwich Panel Walls or need more information about the installation process, don't hesitate to contact us. Our team of experts is ready to assist you with your project, providing you with the best products and professional advice. We look forward to working with you to achieve a successful installation.
References
- Building Codes and Standards: Local building codes and standards should be followed during the installation process to ensure the safety and compliance of the project.
- Manufacturer's Instructions: The installation instructions provided by the manufacturer of the 180mm Sandwich Panel Walls should be carefully followed for optimal performance.
- Structural Engineering Guidelines: For projects with specific structural requirements, guidelines from structural engineering professionals should be considered.