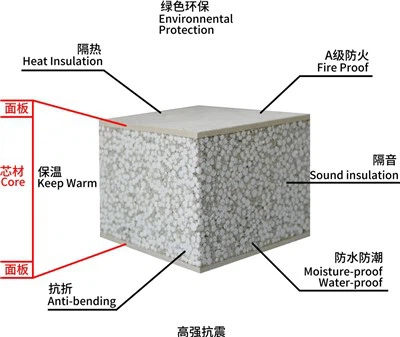

Hey there! As a supplier of EPS sandwich panels, I often get asked about how to cut these panels. It's a crucial skill whether you're a DIY enthusiast or a professional contractor. In this blog, I'll walk you through the steps to cut an EPS sandwich panel like a pro.
Why Cutting EPS Sandwich Panels?
First off, let's talk about why you might need to cut these panels. EPS sandwich panels are super versatile. They're used in various construction projects, like building insulation for 90mm EPS Concrete Sandwich Board, creating partitions, or even for exterior wall cladding with Exterior Wall Sandwich Panel. Sometimes, the standard panel sizes just don't fit your project, so you've got to cut them to size.
Tools You'll Need
Before you start cutting, you'll need the right tools. Here's a list of what I recommend:
- Circular Saw: A circular saw is a great tool for cutting EPS sandwich panels. Make sure to use a fine-tooth blade to get a clean cut.
- Jigsaw: If you need to make curved cuts or cut out small sections, a jigsaw is your best bet.
- Utility Knife: A sharp utility knife can be used for scoring the panel before making a full cut, especially for thinner panels.
- Measuring Tape: Accurate measurements are key. Use a measuring tape to mark where you need to cut.
- Straight Edge: A straight edge helps you keep your cuts straight and precise.
Safety First
Safety should always be your top priority when working with any tools. Here are some safety tips:
- Wear Protective Gear: Put on safety goggles to protect your eyes from flying debris, and wear gloves to protect your hands.
- Work in a Well-Ventilated Area: Cutting EPS panels can create dust, so make sure you're working in a place with good ventilation.
- Follow Tool Safety Guidelines: Read the user manual for each tool and follow all safety instructions.
Step-by-Step Guide to Cutting EPS Sandwich Panels
Now that you've got your tools and safety gear ready, let's get to the cutting process.
Step 1: Measure and Mark
The first step is to measure the panel to determine where you need to cut. Use your measuring tape to get accurate measurements, and then use a pencil or marker to mark the cutting line on the panel. Make sure to use a straight edge to keep your line straight.
Step 2: Choose the Right Cutting Method
Depending on the type of cut you need to make and the thickness of the panel, you'll choose between using a circular saw, jigsaw, or utility knife.
- Using a Circular Saw: If you're using a circular saw, set the depth of the blade to match the thickness of the panel. Place the panel on a stable surface, and align the saw blade with the marked cutting line. Hold the saw firmly and start the saw. Slowly guide the saw along the cutting line, applying even pressure. Keep your hands away from the blade at all times.
- Using a Jigsaw: For curved cuts or small sections, a jigsaw is the way to go. Mark the cutting line on the panel, and then drill a small hole at one end of the line. Insert the jigsaw blade into the hole, and start the jigsaw. Carefully guide the jigsaw along the cutting line, following the curve or shape you need.
- Using a Utility Knife: If you're working with a thinner panel, you can use a utility knife to score the panel first. Place the straight edge along the marked cutting line, and use the utility knife to make a deep score along the line. Then, bend the panel along the scored line to break it. You may need to make a few passes with the knife to get a clean break.
Step 3: Make the Cut
Once you've chosen your cutting method, it's time to make the cut. Take your time and go slowly to ensure a clean and accurate cut. If you're using a saw, keep the saw moving steadily along the cutting line. If you're using a utility knife, apply firm pressure to make a deep score.
Step 4: Clean Up the Edges
After you've made the cut, you may notice some rough edges or debris on the panel. Use a sandpaper or file to smooth out the edges and remove any debris. This will give your panel a professional look.
Tips and Tricks
Here are some additional tips and tricks to help you cut EPS sandwich panels more effectively:


- Use a Backing Board: When cutting with a circular saw or jigsaw, place a backing board under the panel to prevent splintering on the backside.
- Cut on a Stable Surface: Make sure the panel is placed on a stable surface before cutting to prevent it from moving or vibrating.
- Practice on a Scrap Piece: If you're new to cutting EPS sandwich panels, practice on a scrap piece first to get the hang of the cutting process.
- Check the Blade: Regularly check the blade of your saw or knife to make sure it's sharp. A dull blade can make the cutting process more difficult and may result in a rough cut.
Conclusion
Cutting EPS sandwich panels doesn't have to be a difficult task. With the right tools, safety precautions, and a little practice, you can cut these panels like a pro. Whether you're working on a small DIY project or a large construction job, knowing how to cut EPS sandwich panels will come in handy.
If you're in the market for high-quality EPS sandwich panels, we've got you covered. We offer a wide range of Expanded Polystyrene Wall Panels that are perfect for various applications. If you have any questions or want to discuss your project requirements, feel free to reach out to us. We're here to help you find the right panels for your needs.
References
- Woodworking magazines and online resources for general cutting techniques.
- Manufacturer's guidelines for the specific EPS sandwich panels.